Wireless connectivity has become as fundamental to modern business as electricity. When the Wi-Fi works well, nobody notices it. When it does not, everything stops. Meetings cannot happen because video calls drop. Sales teams cannot access their CRM. Warehouse staff cannot scan inventory. For UK businesses that have invested in Cisco Meraki wireless infrastructure, the good news is that the Meraki dashboard provides an extraordinarily powerful set of tools for diagnosing and resolving Wi-Fi issues — if you know where to look and what to look for.
The Meraki cloud-managed platform is used by thousands of UK organisations, from small offices in Cardiff to multi-site enterprises with locations across the country. Its browser-based dashboard provides centralised visibility into every access point, every client device, and every connection, all in real time. This guide walks you through the most common Wi-Fi issues UK businesses face and shows you exactly how to use the Meraki dashboard to diagnose and resolve them.
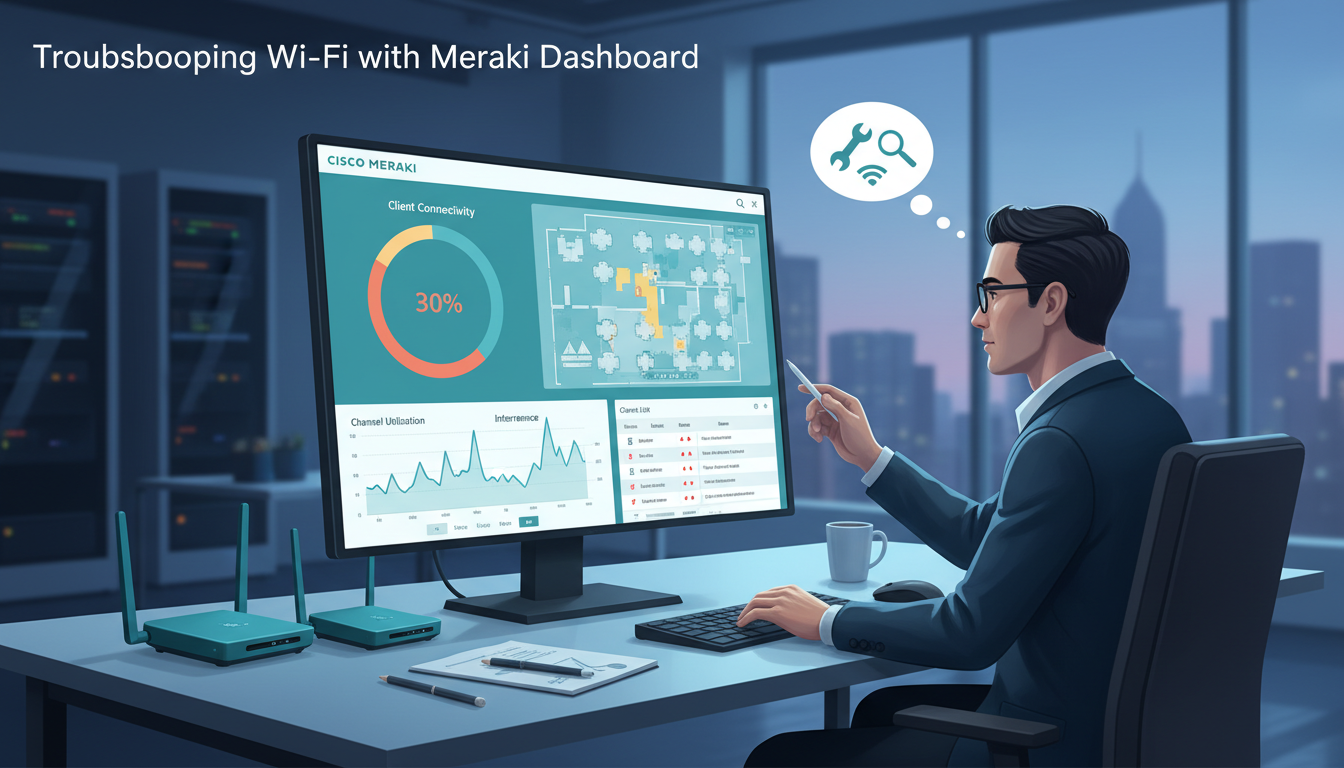
Understanding the Meraki Dashboard for Wireless
The Meraki dashboard organises wireless information into several key areas, each providing different levels of detail. Before diving into troubleshooting specific issues, it helps to understand the dashboard's structure and the information available at each level.
The Network-wide section provides a high-level overview of your entire wireless environment, including client counts, traffic volumes, and overall health metrics. The Wireless section drills down into access point status, SSID configuration, RF analytics, and air quality metrics. The Clients page shows every connected and recently connected device with detailed connection information. The Event log records every significant event across your wireless network, from client associations to authentication failures.
For effective troubleshooting, you will move between these sections frequently, correlating information from different views to build a complete picture of the issue.
Navigating the Dashboard Efficiently
One of the most useful but often overlooked features of the Meraki dashboard is its time range selector. When investigating a reported issue, the first thing you should do is set the time range to match when the problem was observed. The dashboard defaults to showing the last two hours of data, but for intermittent issues or historical analysis, you can extend this to 24 hours, seven days, or even a full month. This historical perspective is invaluable for identifying patterns that are not visible in a short time window.
The dashboard also supports tagging and grouping of access points, which is particularly helpful for organisations with larger deployments. If you manage a multi-floor office in a city centre location, tagging access points by floor or department allows you to quickly isolate whether an issue is localised to a specific area or affecting the entire building. Similarly, if your organisation operates across multiple UK sites — perhaps offices in London and Edinburgh — you can switch between network views to compare performance across locations and identify site-specific problems before they escalate.
For IT teams that prefer programmatic access, the Meraki API provides the same data available in the dashboard through RESTful endpoints. This enables integration with third-party monitoring tools such as Nagios, PRTG, or Grafana, allowing you to incorporate wireless metrics into your broader IT monitoring strategy. Many managed service providers in the UK use this capability to build custom dashboards that combine Meraki wireless data with switch, firewall, and server metrics in a single pane of glass, giving their clients comprehensive visibility without needing to log into multiple platforms.
Meraki dashboard access is controlled by organisation-level and network-level permissions. For troubleshooting, you need at least "Monitor only" access at the network level. For making configuration changes, you need "Full" access. If you are a managed IT client, your provider may grant you read-only dashboard access so you can view network health without risking accidental changes. If you do not have dashboard access, ask your IT provider for a summary of the relevant metrics when reporting wireless issues.
Issue 1: Slow Wi-Fi Speeds
Slow Wi-Fi is the most common complaint in UK offices, and the Meraki dashboard provides several tools to diagnose the root cause.
Check Channel Utilisation
Navigate to Wireless > Radio Settings and examine the channel utilisation for each access point. In the UK, the 2.4 GHz band has only three non-overlapping channels (1, 6, and 11), which means that in dense environments — such as multi-tenant office buildings in London, Manchester, or Birmingham — channel congestion is a major issue. If utilisation exceeds 50% on any channel, performance will degrade noticeably.
The Meraki dashboard's RF spectrum analysis shows not just your own access points' utilisation but also interference from neighbouring networks. In a typical UK office building, you might see dozens of competing networks on the 2.4 GHz band. The solution is often to migrate as many devices as possible to the 5 GHz band, which offers significantly more channels and less congestion.
Analysing Bandwidth Contention
Beyond channel utilisation, the Meraki dashboard allows you to examine bandwidth consumption on a per-client and per-application basis. Navigate to Network-wide > Traffic analytics to see which applications are consuming the most bandwidth. In many UK offices, you will find that cloud backup services, Windows Update distribution, and video streaming account for a significant proportion of wireless bandwidth during business hours. Identifying these bandwidth-hungry applications allows you to implement traffic shaping policies that prevent them from degrading the experience for other users on the same network.
It is also worth checking the number of clients connected to each access point. Meraki access points have recommended client density limits — typically 25 to 30 clients per radio for optimal performance. In hot-desking environments, which are increasingly common in UK businesses adopting flexible working arrangements, client counts can fluctuate dramatically throughout the day. If your dashboard shows that certain access points regularly serve more than 30 clients during peak hours, you may need to add additional access points or adjust your floor plan to distribute the wireless load more evenly across the available infrastructure.
Review Client Connection Details
Click on a specific client device in the Clients page to see its connection details. Check which band it is connected on (2.4 GHz or 5 GHz), its signal strength (RSSI), its data rate, and its channel. A client connected at -75 dBm on the 2.4 GHz band will have a very different experience from one connected at -55 dBm on 5 GHz. The dashboard shows these metrics in real time, allowing you to identify whether the issue is device-specific or affecting all clients.
Auditing Client Device Capabilities
A frequently overlooked cause of slow Wi-Fi is outdated client hardware. The Meraki dashboard shows the wireless standard each client is using — 802.11n, 802.11ac, or 802.11ax (Wi-Fi 6). If a significant proportion of your workforce is using older laptops that only support 802.11n, they will be limited to lower data rates even if your access points support the latest standards. This information is visible on the Clients page and can inform hardware refresh planning, helping you build a business case for upgrading devices that are dragging down overall network performance.
Furthermore, the dashboard can reveal whether clients are connecting on the 2.4 GHz band when they are capable of using 5 GHz. Band steering, configured under Wireless > Radio settings, encourages dual-band clients to connect on 5 GHz by briefly delaying the response to 2.4 GHz probe requests. Enabling this feature on your Meraki network can produce an immediate improvement in performance for the majority of modern devices, as it reduces congestion on the crowded 2.4 GHz band and takes advantage of the superior throughput available on 5 GHz. For UK organisations where device procurement is centralised, ensuring all new laptops and tablets support Wi-Fi 6 should be a standard requirement in your purchasing specifications.
| Signal Strength (RSSI) | Quality | Expected Experience | Action Required |
|---|---|---|---|
| -30 to -50 dBm | Excellent | Full speed, reliable connections | None |
| -50 to -60 dBm | Good | Good speed, reliable for all applications | None |
| -60 to -70 dBm | Fair | Adequate for email and web, video may buffer | Consider AP placement or power adjustment |
| -70 to -80 dBm | Poor | Slow, unreliable, frequent disconnections | Additional AP needed or reposition existing |
| Below -80 dBm | Unusable | Connection drops, extremely slow | Immediate AP coverage gap to address |
Issue 2: Devices Failing to Connect
When devices cannot connect to Wi-Fi at all, the Meraki event log is your primary diagnostic tool. Navigate to Network-wide > Event log and filter by the affected device's MAC address or username. Common events to look for include:
Association failures — the device is failing to associate with the access point. This can indicate a driver issue on the client device, an incompatible security protocol, or an overloaded access point that is rejecting new connections.
Authentication failures — the device associates but fails authentication. For WPA2-Enterprise networks using RADIUS, check whether the RADIUS server is reachable and responding. For WPA2-Personal networks, verify the pre-shared key is correct. The event log will typically show the specific authentication failure reason.
DHCP failures — the device authenticates but does not receive an IP address. This points to a DHCP server issue — either the server is not reachable from the VLAN the SSID is mapped to, or the DHCP scope is exhausted. Check your DHCP server's lease pool and ensure the Meraki access points can reach it on the correct VLAN.
Diagnosing RADIUS and Certificate Issues
For organisations using WPA2-Enterprise or WPA3-Enterprise authentication — which is the recommended approach for any business network — RADIUS-related failures are a common source of connection problems. The Meraki dashboard's event log will show specific RADIUS response codes that indicate the nature of the failure. A RADIUS access reject means the credentials were actively refused, whilst a RADIUS timeout indicates that the RADIUS server did not respond within the expected timeframe. Both scenarios present differently to end users, but the event log makes the distinction clear.
In UK businesses that use Microsoft Active Directory with Network Policy Server (NPS) as their RADIUS server, certificate expiry is a surprisingly frequent cause of authentication failures. The server certificate used by NPS must be valid and trusted by the connecting clients. When this certificate expires, all devices attempting to connect via 802.1X will fail authentication simultaneously — creating what appears to be a major wireless outage when the root cause is actually a certificate management oversight. The Meraki dashboard will show a sudden spike in authentication failures across all clients, which is a strong indicator of a certificate or RADIUS server issue rather than a wireless infrastructure problem.
Additionally, check that your RADIUS server is correctly configured to accept requests from the Meraki access points' IP addresses. If you have recently added new access points or changed their IP addressing, the RADIUS server may be rejecting their requests as unauthorised. The dashboard's packet capture feature, available on compatible access point models, can provide detailed 802.1X handshake information to help pinpoint exactly where the authentication process is failing. For organisations with multiple sites across the UK, ensure that each site's access points are included in the RADIUS server's allowed client list and that network latency between the access points and the RADIUS server does not exceed acceptable thresholds.
Issue 3: Intermittent Disconnections
Intermittent Wi-Fi disconnections are perhaps the most frustrating issue to troubleshoot because they are difficult to reproduce on demand. The Meraki dashboard's historical data is invaluable here.
Start by examining the client's connection timeline in the Clients page. Meraki records every association, disassociation, and roaming event, allowing you to see exactly when the client disconnected and what happened immediately before. Look for patterns — does the disconnection happen at the same time each day? Does it correlate with the client moving between access points? Does it affect one client or many?
Roaming Issues
In offices with multiple access points, clients must roam seamlessly between APs as users move around the building. Poor roaming causes brief disconnections that manifest as dropped Teams calls, interrupted file transfers, or temporary loss of application access. The Meraki dashboard shows roaming events and the time taken for each roam. If roaming times exceed 100 milliseconds, users will notice disruption.
Common causes of poor roaming include access points with excessive power settings (causing "sticky clients" that hold onto a distant AP instead of roaming to a closer one), band steering misconfiguration, and client devices with aggressive power-saving settings that are slow to respond to roaming triggers.
Environmental and Infrastructure Factors
Physical environment changes are a frequently overlooked cause of intermittent wireless issues. In UK offices, seasonal changes can have a measurable impact on Wi-Fi performance. For example, foliage on trees near windows can affect signal propagation during summer months, and increased use of portable heaters in winter — particularly fan heaters and microwaves in kitchen areas — can generate RF interference on the 2.4 GHz band. If your Meraki dashboard shows periodic spikes in channel utilisation that correlate with lunch times or tea breaks, microwave interference is a likely culprit.
Building modifications also warrant attention. If your facilities team has recently installed new partitions, metal shelving, or even large monitors and whiteboards, these can alter the RF environment significantly. Glass partitions, which are popular in modern UK office fit-outs, are largely transparent to Wi-Fi signals, but the metal frames that support them can cause reflections and dead spots. The Meraki dashboard's historical signal strength data for affected clients can help you correlate the onset of problems with physical changes in the office environment.
Firmware updates on both access points and client devices should not be discounted as a cause of intermittent issues. Meraki manages firmware updates centrally, and whilst they generally improve stability, occasionally a firmware release can introduce regressions for specific client device types. The dashboard shows the current firmware version for each access point, and you can schedule firmware updates during maintenance windows to minimise disruption. If you notice intermittent issues starting shortly after a firmware update, check the Meraki community forums and release notes for known issues affecting your specific hardware model.
Signs of Roaming Problems
- Video calls drop when walking between areas
- Devices stay connected to far-away access points
- Signal strength varies wildly in the same location
- Some areas have overlapping strong signals
- Event log shows frequent association/disassociation
- Latency spikes during movement
Well-Tuned Roaming Configuration
- Seamless handoff between access points
- Consistent signal strength across office
- Access points at appropriate power levels
- 802.11r/k/v fast roaming enabled
- Band steering directing clients to 5 GHz
- Minimum bitrate settings preventing slow connections
Issue 4: Poor Video and Voice Quality
With Microsoft Teams, Zoom, and other video conferencing platforms now essential to UK business operations, Wi-Fi quality directly affects communication quality. Video and voice applications are particularly sensitive to three network characteristics: latency, jitter, and packet loss.
The Meraki dashboard provides application-level visibility that can help identify whether poor call quality is a Wi-Fi issue or an upstream network problem. Navigate to Wireless > Wireless health and examine the latency and loss metrics for your access points. Then check Network-wide > Traffic analytics to see whether video and voice traffic is receiving appropriate prioritisation.
For businesses heavily reliant on video conferencing, configure Quality of Service (QoS) settings in the Meraki dashboard to prioritise voice and video traffic over bulk data transfers. This ensures that a large file download does not consume all available bandwidth and degrade call quality for other users. DSCP marking and WMM (Wi-Fi Multimedia) settings in the Meraki SSID configuration control this prioritisation.
Monitoring Real-Time Call Quality
For businesses that rely heavily on Microsoft Teams or Zoom, the Meraki dashboard can be used in conjunction with these platforms' own diagnostic tools to build a comprehensive picture of call quality. The Teams Admin Centre provides per-call quality metrics including audio jitter, packet loss, and round-trip latency, which can be correlated with the Meraki dashboard's wireless metrics for the same time period. If the Teams diagnostics show poor call quality but the Meraki dashboard shows healthy wireless metrics, the issue likely lies upstream — perhaps in your internet connection or the ISP's network rather than your wireless infrastructure.
Consider configuring dedicated SSIDs for voice and video traffic if your organisation makes extensive use of real-time communications. A dedicated SSID with appropriate QoS settings, connected to a VLAN with guaranteed bandwidth, ensures that video conferencing traffic is isolated from general web browsing and file transfer activity. This approach is particularly effective in environments where bandwidth is limited or shared, such as serviced offices and co-working spaces that are increasingly common across UK business districts.
The Meraki dashboard's application visibility feature can also identify specific applications that are competing with your voice and video traffic. Large cloud backup operations, software deployment tools such as Microsoft SCCM or Intune pushing updates, and even peer-to-peer applications can consume enough bandwidth to impact call quality. Scheduling these bandwidth-intensive operations outside business hours, or applying per-client bandwidth limits through the Meraki dashboard, can dramatically improve the experience for users on video calls throughout the working day.
Proactive Monitoring: Preventing Issues Before They Happen
The most effective use of the Meraki dashboard is not reactive troubleshooting but proactive monitoring. By regularly reviewing key metrics, you can identify and resolve potential issues before they affect your users.
Set up email alerts in the Meraki dashboard for access point offline events, high channel utilisation, and configuration changes. Review the wireless health dashboard weekly, looking for trends in client count, latency, and connection success rates. Pay particular attention to periods of change — new staff joining, office layout modifications, or the installation of new equipment that might cause RF interference.
The Meraki dashboard also provides a Location Heatmap feature (with compatible access points) that shows client density across your floor plan. This can reveal areas of the office that are overcrowded from a wireless perspective, even if they do not appear congested physically. Adding an access point to a high-density area is far less disruptive than troubleshooting complaints after they start.
Establishing Baselines and Documentation
Effective proactive monitoring requires a documented baseline of normal network performance. Spend time during a period of normal operation recording key metrics from the Meraki dashboard: average client count per access point, typical channel utilisation on each band, baseline latency figures, and connection success rates. Store these figures in your IT documentation so that when an issue arises, you can quickly determine whether current metrics represent a genuine deviation from normal behaviour or fall within expected parameters.
Regular wireless health reviews — ideally monthly — should be a standard part of your IT operations. During these reviews, examine the Meraki dashboard for trends that might indicate emerging problems. A gradually increasing client count on a particular access point, for example, might suggest that a team has grown and additional wireless capacity is needed before users start experiencing congestion. Similarly, a slow increase in channel utilisation might indicate new interference sources in neighbouring offices that will eventually cause performance problems if left unaddressed.
For UK organisations with compliance requirements — whether Cyber Essentials, ISO 27001, or sector-specific regulations — the Meraki dashboard provides the audit trail and reporting capabilities needed to demonstrate that your wireless network is properly managed and monitored. The change log records every configuration modification with timestamps and administrator details, the event log provides a detailed history of network events, and the summary reports can be exported for inclusion in compliance documentation. This level of visibility and accountability is one of the significant advantages of cloud-managed wireless infrastructure over traditional controller-based or standalone access point deployments.
Need Expert Meraki Support?
Cloudswitched is an experienced Meraki partner supporting businesses across the United Kingdom. From initial wireless design and deployment to ongoing monitoring and troubleshooting, we ensure your Meraki network delivers the performance your business depends on. Get in touch for a wireless health assessment.
GET IN TOUCH
CloudSwitched
London-based managed IT services provider offering support, cloud solutions and cybersecurity for SMEs.


