Project management is one of those areas where UK businesses often find themselves caught between two extremes. At one end, dedicated project management tools like Microsoft Project, Asana, or Monday.com offer comprehensive functionality but come with significant cost, complexity, and a steep learning curve that most small teams never climb. At the other end, many businesses default to managing projects through email threads, shared spreadsheets, and informal conversations — an approach that works for simple tasks but collapses spectacularly when projects become even moderately complex.
Microsoft Planner sits in the sweet spot between these extremes. Included at no additional cost in most Microsoft 365 Business and Enterprise subscriptions, Planner provides a visual, intuitive project management tool that is powerful enough for real-world project coordination yet simple enough that any employee can start using it productively within minutes. For UK SMEs already invested in the Microsoft 365 ecosystem, Planner represents one of the most underutilised tools in their existing subscription — delivering genuine productivity improvements at zero incremental cost.
This guide explains how to set up and use Microsoft Planner effectively, covering everything from basic board creation to advanced features such as label categorisation, checklist management, timeline views, and integration with Microsoft Teams. Whether you are managing an office relocation, an IT infrastructure upgrade, a marketing campaign, or any other multi-person project, Planner can bring structure, visibility, and accountability to the process.
Why Planner Suits UK SMEs
The UK small and medium enterprise landscape has particular characteristics that make Microsoft Planner an especially compelling choice. Most UK SMEs operate with lean teams where individuals wear multiple hats, making simplicity and low administrative overhead essential in any project management tool. Unlike enterprise-grade tools that require a dedicated project management office to administer and maintain, Planner can be managed by anyone with basic digital literacy — which means your operations manager, office manager, or team leader can own the project management process without requiring specialist training or professional certification in project management methodologies.
Cost is another significant factor for budget-conscious UK businesses. The project management software market is crowded with tools that charge per user per month, and for a twenty-person business, a dedicated project management tool can easily cost two hundred to four hundred pounds per month. Planner eliminates this cost entirely for businesses that already subscribe to Microsoft 365, which the vast majority of UK businesses do. The savings become even more significant when you factor in the avoided costs of onboarding, training, and integrating a separate tool into your existing workflows. Every pound saved on unnecessary software subscriptions is a pound that can be invested in growing the business.
Perhaps most importantly for UK businesses navigating hybrid and flexible working arrangements, Planner provides a single source of truth for project status that is accessible from anywhere. Whether team members are working from the office in Manchester, from home in Surrey, or visiting a client in Edinburgh, everyone sees the same up-to-date view of the project. This visibility eliminates the confusion and duplication that commonly plague teams relying on email and spreadsheets to coordinate work across distributed locations. In an era where the average UK knowledge worker splits their time between office and remote working, this accessibility is not merely convenient — it is essential for maintaining project momentum and team alignment.
Getting Started: Creating Your First Plan
Microsoft Planner is accessible through the Microsoft 365 web portal, the Planner mobile app, and — most conveniently — directly within Microsoft Teams. Every plan in Planner is associated with a Microsoft 365 Group, which means creating a plan also creates a shared mailbox, SharePoint document library, and OneNote notebook for the project. This integration is one of Planner's strongest features, as it ensures all project-related resources are automatically grouped together.
To create a new plan, navigate to tasks.office.com or open the Planner app within Microsoft Teams. Click "New Plan" and give it a descriptive name — for example, "Birmingham Office Relocation Q1 2026" or "Website Redesign Project." Choose whether the plan should be public (visible to everyone in your organisation) or private (visible only to members you specifically invite). For most project management scenarios, private plans are appropriate to avoid cluttering other people's views with irrelevant information.
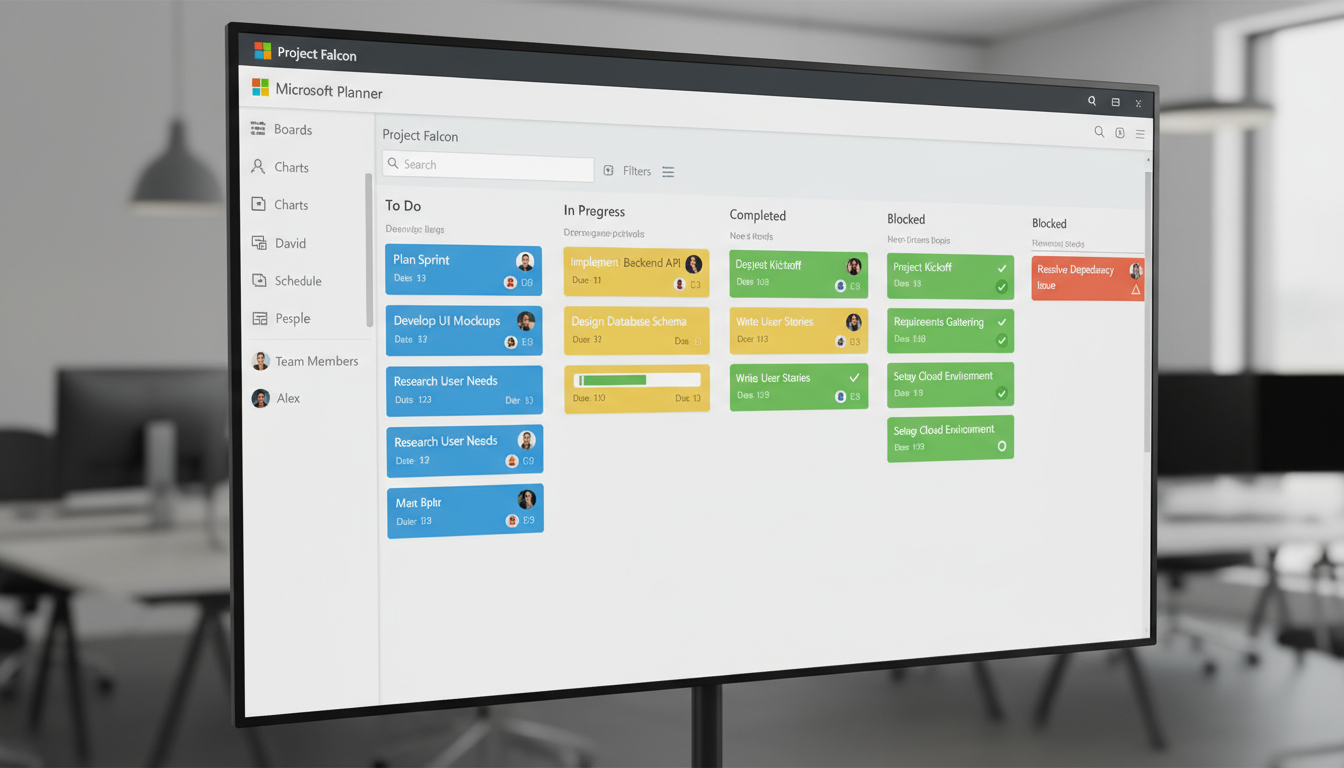
Once created, you will see an empty board view with a single column called "To do." This is your starting point for organising the project. The board view in Planner follows the Kanban methodology — tasks are represented as cards that move through columns (called "buckets") as they progress from inception to completion. The visual nature of this approach makes it immediately obvious what needs to be done, what is in progress, who is responsible for each task, and where bottlenecks are forming.
Understanding the Microsoft 365 Group Foundation
One of the most powerful yet frequently misunderstood aspects of Planner is its foundation on Microsoft 365 Groups. When you create a plan, you are not simply creating a task board — you are establishing a collaborative workspace that includes a shared Outlook mailbox, a SharePoint document library, a OneNote notebook, and a shared calendar. This means that from the moment you create your project plan, your team already has a structured place to store project documents, share meeting notes, and communicate via group email, all automatically linked to the project without any additional configuration or setup effort.
This integration eliminates one of the most common frustrations in project management: scattered information. Rather than project documents living in one person's OneDrive, meeting notes buried in another person's email, and task assignments tracked in a spreadsheet on a shared drive, everything is centralised and accessible to every team member through a single group. When a new person joins the project, they can be added to the Microsoft 365 Group and immediately gain access to the entire project history — documents, conversations, and task records alike. This onboarding advantage is particularly valuable in organisations with high staff turnover or where contractors and temporary workers are brought in to support specific project phases, as it dramatically reduces the time needed to get new team members up to speed.
Microsoft Planner is designed for task management and lightweight project coordination. It excels when projects involve multiple team members working on parallel tasks with clear deadlines and assignments. Microsoft Project, by contrast, is a full-featured project management tool designed for complex projects with dependencies, resource levelling, critical path analysis, and Gantt chart scheduling. For most UK SMEs, Planner provides more than enough capability. Reserve Microsoft Project for large, complex projects with significant interdependencies — such as major IT infrastructure deployments or building construction projects where precise scheduling is critical.
Organising Tasks with Buckets
Buckets are the columns on your Planner board, and they provide the primary organisational structure for your project. The default "To do" bucket is just a starting point — you should create additional buckets that reflect the natural workflow or structure of your project.
For a workflow-based approach, create buckets representing the stages of your process: "Backlog," "To Do," "In Progress," "Review," and "Complete." Tasks move from left to right as they progress through each stage. This approach works well for ongoing operational processes such as content creation, client onboarding, or support ticket management.
For a project-based approach, create buckets representing the major phases or workstreams of your project: "Planning," "Design," "Build," "Testing," and "Launch." This approach works well for discrete projects with a defined start and end date, such as an office move, a system migration, or a marketing campaign launch.
For a team-based approach, create buckets for each team or department involved: "IT Team," "Facilities," "HR," "Communications." This approach works well for cross-functional projects where different teams have distinct responsibilities and you want to see at a glance what each team is working on.
Evolving Your Bucket Structure
Your initial bucket structure is a starting point, not a permanent fixture. As your project progresses, you will likely find that some buckets become overloaded whilst others remain nearly empty. This is a natural signal that your structure needs adjusting. Do not hesitate to split a crowded bucket into two more specific ones, merge underused buckets, or rename them to reflect how your team is actually using the board. The flexibility to restructure without losing data is one of Planner's practical advantages over more rigid project management tools that penalise you for changing your organisational approach mid-project.
Consistency across projects is equally important, particularly if your organisation runs multiple plans simultaneously. Establishing a standard bucket template that is used as the starting point for every new project gives team members a familiar structure regardless of which project they are working on. This reduces cognitive load and helps people find information quickly when they switch between projects. For example, if every project plan in your organisation uses the same workflow-based bucket structure, a team member moving between projects can immediately orient themselves without needing a walkthrough of each individual board layout.
Consider also how your bucket structure relates to your reporting needs. If you regularly need to report on project progress by phase, a phase-based bucket structure makes this trivially easy — you can see at a glance how many tasks remain in each phase. If your management team wants to see workload distribution by department, a team-based structure provides instant visibility. Align your structure with the questions your stakeholders most frequently ask, and the Planner board itself becomes a living report that requires no additional preparation for status meetings. This alignment between operational structure and reporting needs is one of the hallmarks of effective project management practice.
Good Bucket Structures
- Workflow: Backlog → To Do → In Progress → Done
- Phase: Planning → Design → Build → Test → Launch
- Priority: Critical → High → Medium → Low
- Workstream: IT → Facilities → HR → Comms
- Sprint: Week 1 → Week 2 → Week 3 → Week 4
Common Bucket Mistakes
- Too many buckets — more than 8 becomes unreadable
- Vague names: "Stuff" or "Misc" or "Other"
- Mixing organisational approaches in one plan
- Single bucket with all tasks piled together
- Buckets per person instead of per workstream
Creating and Assigning Tasks
Each card on your Planner board represents a single task. Tasks should be specific, actionable, and small enough to be completed by a single person within a reasonable timeframe — typically a few hours to a few days. Vague tasks like "Sort out the IT" are unhelpful; specific tasks like "Order 15 Dell Latitude 5540 laptops from XMA" are actionable and measurable.
When creating a task, assign it to the person responsible for its completion. Planner supports assigning a task to multiple people, but use this sparingly — shared accountability often becomes no accountability. It is better to assign one primary owner and use the comments feature to involve others. Set a due date to create urgency and enable the timeline view to show upcoming deadlines.
Use the task description field to provide context, instructions, and any reference information the assignee needs. Attach relevant documents directly to the task card — because Planner is integrated with SharePoint, you can attach files stored in your project's document library without duplicating them. Add a checklist of sub-steps within the task to break down complex activities and track incremental progress.
Labels provide an additional layer of categorisation. Planner offers six colour-coded labels per plan, and you can rename them to suit your project. Common label schemes include priority levels (Critical, High, Medium, Low), task types (Planning, Execution, Review), or departments (IT, Finance, HR, Operations). Labels appear as coloured strips on the task card, making it easy to scan the board and identify tasks by category.
Managing Task Dependencies and Priorities
While Planner does not offer formal dependency tracking in the way that Microsoft Project does, there are practical techniques for managing task relationships effectively. Use the checklist feature within a parent task to list prerequisite activities, and include a note in the task description identifying any blocking dependencies. For example, a task titled "Configure network switches" might include a description note stating "Blocked by: Cabling installation must be complete first." This approach relies on human discipline rather than automated enforcement, but for the scale of projects that Planner is designed for, it works effectively and avoids the complexity overhead of formal dependency management.
Priority management deserves careful attention, as it directly affects which work gets done first. Planner provides a built-in priority field with four levels — Urgent, Important, Medium, and Low — but these are only useful if your team applies them consistently. Define clear criteria for each priority level at the start of the project and document them in the plan's shared OneNote notebook. For instance, "Urgent" might mean a task that is blocking other team members or has a deadline within twenty-four hours, whilst "Low" might mean a desirable improvement that can wait until after launch. Without agreed criteria, priority labels become subjective and lose their value as a coordination mechanism across the team.
Regularly review and re-prioritise tasks as the project evolves. What seemed urgent at the start of the project may become less critical as circumstances change, and new priorities will inevitably emerge as the work progresses. A weekly ten-minute priority review — where the project owner scans the board and adjusts priority labels based on current reality — keeps the board accurate and ensures that team members are always working on the most valuable tasks available to them. This discipline is especially important in fast-moving projects where the landscape shifts frequently and yesterday's priorities may no longer reflect today's most pressing needs.
| Task Element | Purpose | Best Practice |
|---|---|---|
| Task Name | Identifies the work to be done | Start with a verb — "Order," "Configure," "Review" |
| Assignment | Identifies who is responsible | One primary owner per task |
| Due Date | Creates deadline and enables timeline view | Set realistic dates; review weekly |
| Checklist | Breaks down complex tasks into sub-steps | 3-8 items per checklist; keep granular |
| Labels | Categorises tasks visually | Define labels at project start; use consistently |
| Attachments | Links relevant files and documents | Use SharePoint links rather than uploading copies |
| Comments | Communication about the task | Use for updates and questions; keep discussion here not in email |
Using Charts and Analytics
Planner includes built-in charts that provide a visual summary of your project's status. The Charts view shows the number of tasks in each status (not started, in progress, completed, late), the distribution of tasks across buckets, tasks by assignee, and tasks by priority. These charts update in real time as tasks are modified, giving you an always-current snapshot of project health without requiring manual reporting.
The Charts view is particularly useful for project meetings and status updates. Rather than compiling a separate status report, simply share your screen and walk through the charts. Everyone can see at a glance how many tasks are on track, how many are overdue, which team members are carrying the heaviest load, and which areas of the project need attention.
For more detailed reporting, you can export Planner data to Microsoft Excel using the "Export to Excel" function. This creates a spreadsheet containing all task data — names, assignments, dates, statuses, and checklists — which you can then analyse, filter, pivot, and chart using Excel's powerful data analysis tools. This is useful for creating formal project reports, tracking trends over time, and performing workload analysis.
Using Data to Improve Project Estimation
One of the overlooked benefits of consistently using Planner is the data it generates about your team's actual work patterns. Over time, you build a valuable dataset showing how long tasks typically take to complete, which types of work are most frequently delayed, and where estimation errors are most common. This historical data is gold for improving the accuracy of future project plans. If your team's Planner history shows that server configuration tasks consistently take three days rather than the one day originally estimated, you can adjust future plans accordingly and set more realistic expectations with stakeholders from the outset.
The Charts view and Excel exports also reveal workload distribution patterns that may not be obvious from the board view alone. You might discover that one team member is consistently assigned twice as many tasks as their colleagues, or that a particular project phase always accumulates more overdue tasks than others. These insights enable proactive management decisions — redistributing workload before someone becomes overwhelmed, or allocating additional resources to phases that historically prove more demanding than anticipated. Data-driven project management, even at this basic level, produces significantly better outcomes than relying on intuition and gut feeling alone.
For businesses that run similar projects repeatedly — such as client onboarding processes, product launches, or quarterly reporting cycles — Planner data enables the creation of increasingly refined templates. After completing three or four iterations of a similar project, you will have enough data to build a template plan with realistic task lists, accurate time estimates, and proven bucket structures. This template effect accelerates project setup and reduces the risk of forgetting critical tasks, as the template captures the collective learning from every previous iteration and encodes it into a reusable starting point for the next.
Integrating Planner with Microsoft Teams
The most effective way to use Microsoft Planner in a UK business is through its integration with Microsoft Teams. By adding a Planner tab to a Teams channel, you embed the project board directly into the communication space where your team is already working. This eliminates the need to switch between applications and ensures that project tasks are visible in the context of the team's daily conversations.
To add Planner to a Teams channel, navigate to the channel, click the "+" button to add a new tab, select "Tasks by Planner and To Do," and either create a new plan or link an existing one. The full Planner board is now accessible directly within Teams. Team members can view tasks, update statuses, add comments, and mark tasks as complete without ever leaving the Teams interface.
This integration also enables Planner notifications within Teams. When a task is assigned to you, when a due date approaches, or when someone comments on one of your tasks, you receive a notification in your Teams activity feed. This keeps everyone informed and accountable without relying on separate notification systems or email alerts.
For businesses using the new Microsoft Planner (which merged the previous Planner and To Do into a unified experience), personal tasks and team project tasks now appear in a single view. Employees can see their individual to-do list alongside their assignments from team plans, creating a comprehensive personal task dashboard that prevents items from falling through the cracks.
Mobile Access and Notification Management
The Planner mobile app, available for both iOS and Android, extends project visibility beyond the desktop. Team members can view their assigned tasks, update statuses, add comments, and mark items as complete from their phone or tablet. For field-based workers, travelling staff, or anyone who steps away from their desk frequently, the mobile app ensures that task management does not become something that only happens at a computer. The app is particularly valuable for time-sensitive tasks where prompt updates are important — for example, confirming that a delivery has arrived, that a site visit has been completed, or that a client has approved a proposal that was blocking subsequent work.
Notification management requires deliberate configuration to be effective without becoming overwhelming. By default, Planner sends email notifications for task assignments and approaching deadlines, whilst the Teams integration provides activity feed alerts. For team members who are assigned to multiple plans, the volume of notifications can quickly become counterproductive if left unconfigured. Encourage your team to configure their notification preferences deliberately — keeping alerts for task assignments and deadline warnings whilst suppressing less critical notifications such as comments on tasks they are merely following rather than owning. A well-configured notification system keeps people informed without contributing to the notification fatigue that plagues modern knowledge workers.
The unified My Tasks view in the new Microsoft Planner experience deserves particular attention for individual productivity. This view aggregates tasks from every plan a person belongs to into a single personal dashboard, sorted by due date and priority. It provides a clear, definitive answer to what each person should work on next, without requiring them to check multiple project boards individually. Encouraging every team member to start their day by reviewing their My Tasks view creates a simple but powerful daily planning habit that significantly improves task completion rates across the organisation and ensures that no assigned task goes unnoticed or neglected.
Power Automate: Supercharging Planner with Automation
Microsoft Power Automate (formerly Flow) can extend Planner's capabilities significantly by automating routine actions. Useful automations for Planner include automatically creating tasks from form submissions (useful for intake processes), sending reminder emails when due dates approach, posting a Teams message when a task is marked complete, escalating overdue tasks to a manager, and creating weekly status summary emails from plan data.
These automations reduce the manual overhead of project management and ensure that nothing falls through the cracks. For example, a Power Automate flow that sends a daily digest of overdue tasks to the project manager ensures that late items are flagged immediately, without anyone needing to manually check the board each morning. Similarly, an automation that creates a Planner task whenever a specific form is submitted can streamline request intake processes — for IT support requests, facilities maintenance, or content approval workflows.
Power Automate templates for common Planner scenarios are available in the Microsoft template gallery, making it straightforward to set up useful automations even without technical expertise. For more complex workflows, Power Automate's visual designer allows you to build sophisticated multi-step automations with conditional logic, loops, and integrations with external services.
Governance and Scaling Across the Organisation
As Planner adoption grows across your organisation, governance becomes increasingly important. Without some basic guidelines, you risk ending up with dozens of abandoned plans, inconsistent naming conventions, and confusion about which plan is the authoritative source for a given project. Establish a simple naming convention for plans — for example, using a format such as the department name, followed by the project name, followed by the year and quarter — and designate plan owners who are responsible for keeping their plans current and archiving them when projects are complete. This small investment in governance prevents the clutter and confusion that undermine the value of any shared tool.
Consider creating a central register of active plans, either in a SharePoint list or a simple Excel spreadsheet, that records every active plan in the organisation along with its owner, start date, and expected completion date. This register gives management visibility into all ongoing projects without requiring access to every individual plan, and it helps prevent the duplication of effort that can occur when different teams inadvertently create separate plans for overlapping work. For larger organisations, this register also serves as a useful resource planning tool, revealing when multiple projects are competing for the same team members during the same period.
For organisations with more mature project management needs, Planner can serve as the task execution layer within a broader portfolio management framework. Strategic priorities and resource allocation decisions are made at the portfolio level — perhaps using a simple spreadsheet or a SharePoint list — whilst the detailed task management happens in Planner at the project level. This layered approach gives senior leadership the high-level visibility they need for strategic decisions whilst providing operational teams with a practical, usable tool for managing their daily work. The key is to avoid over-engineering the governance framework; a lightweight structure that people actually follow is infinitely more valuable than a comprehensive framework that everyone ignores because it demands too much administrative effort.
Want to Get More from Microsoft 365?
Cloudswitched helps UK businesses unlock the full potential of their Microsoft 365 subscription — from Planner and Teams to SharePoint, Power Automate, and beyond. Let us show your team how to work smarter with the tools you already have.
Explore Cloud Email Solutions
CloudSwitched
London-based managed IT services provider offering support, cloud solutions and cybersecurity for SMEs.


