Azure virtual machines represent one of the most significant line items on any organisation's cloud bill. For UK businesses running workloads on Microsoft Azure — whether application servers, database instances, development environments, or legacy systems migrated from on-premise — the choice of VM size directly determines how much you pay every month. And the uncomfortable truth is that the majority of Azure VMs are oversized for their actual workloads, silently consuming budget that could be better allocated elsewhere.
Right-sizing is the process of matching your virtual machine configurations to your actual resource requirements. It sounds straightforward, but in practice it requires careful analysis, understanding of Azure's VM families and pricing, and ongoing vigilance to ensure that resource allocation stays aligned with demand as workloads evolve. The potential savings are substantial — organisations that systematically right-size their Azure VMs typically achieve cost reductions of 20% to 40% on compute spend.
This guide explains how to identify oversized VMs, select the right VM sizes, implement right-sizing changes safely, and establish ongoing governance to prevent waste from creeping back in.
Why Are Azure VMs Typically Oversized?
Oversizing happens for perfectly understandable reasons. When migrating from on-premise servers, teams often match or exceed the original server specifications "just to be safe." Development teams request generous resources to avoid performance issues during testing. And once a VM is running in production, nobody wants to be the person who reduces its resources and causes an outage. The result is an environment where VMs routinely have far more CPU, memory, and storage than they actually use.
The psychology of cloud resource allocation creates a natural bias towards oversizing. In on-premise environments, adding more resources after deployment is difficult and expensive — you might need to buy new hardware, schedule downtime, and physically install components. In the cloud, resources are elastic, but the mindset from the on-premise era persists. People provision for the worst case and never revisit the decision.
There is also an organisational dimension to the problem. In many UK businesses, the team responsible for provisioning infrastructure is separate from the team responsible for paying the bills. Without clear cost accountability, there is no incentive to choose the smallest adequate VM size. The person requesting the resource bears no cost consequence for choosing a D8s v5 when a D4s v5 would have been perfectly adequate. This disconnect between consumption and financial responsibility is one of the primary drivers of cloud waste across organisations of all sizes.
Seasonal and cyclical workload patterns further complicate matters. A UK retail business might genuinely need larger VMs during the November and December peak trading period, but those same VMs sit largely idle from January through September. Without automated scaling or a regular review cadence, the peak-period configuration becomes the permanent configuration, and the business pays premium prices for capacity it uses intensively for only two or three months of the year.
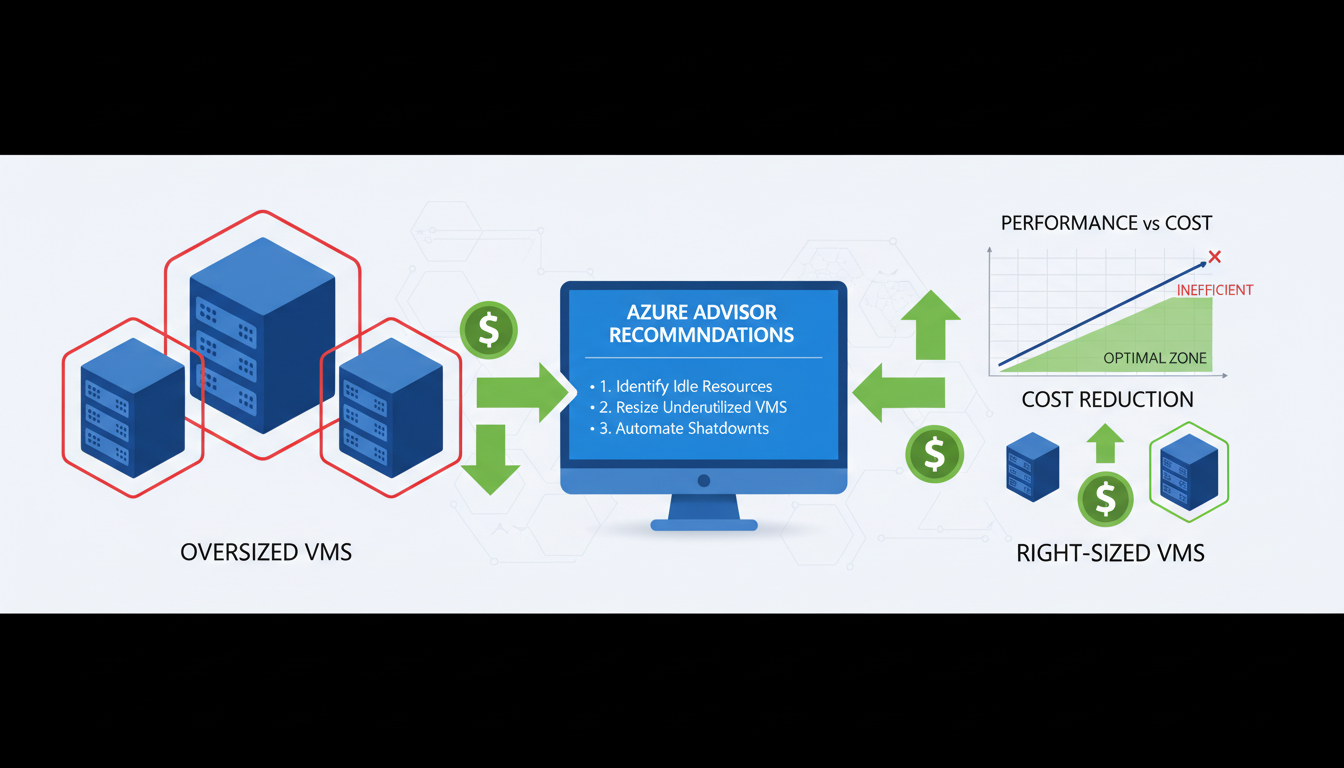
Azure Advisor is a free service built into the Azure portal that analyses your resource usage patterns and provides specific right-sizing recommendations. It monitors CPU utilisation, memory usage, and network throughput over time, then suggests smaller VM sizes that would still meet your workload requirements. Azure Advisor recommendations are the starting point for any right-sizing exercise, but they should be validated against application-specific requirements rather than implemented blindly.
Understanding Azure VM Families
Azure offers a bewildering array of VM sizes, organised into families based on their intended use case. Understanding these families is essential for right-sizing, because choosing the right family is as important as choosing the right size within that family.
| VM Family | Optimised For | Typical Use Cases | UK Region Pricing (example) |
|---|---|---|---|
| B-series (Burstable) | Variable workloads with low average CPU | Dev/test, small web servers, micro-services | From £0.004/hr (B1s) |
| D-series (General Purpose) | Balanced CPU-to-memory ratio | Application servers, databases, ERP systems | From £0.04/hr (D2s v5) |
| E-series (Memory Optimised) | High memory-to-CPU ratio | Large databases, in-memory caching, analytics | From £0.05/hr (E2s v5) |
| F-series (Compute Optimised) | High CPU-to-memory ratio | Batch processing, gaming servers, modelling | From £0.04/hr (F2s v2) |
| L-series (Storage Optimised) | High disk throughput and IOPS | Big data, SQL and NoSQL databases, data warehousing | From £0.06/hr (L8s v3) |
One of the most common right-sizing opportunities involves moving workloads from general-purpose D-series VMs to burstable B-series VMs. Many application servers, web servers, and lightweight database instances spend the vast majority of their time at low CPU utilisation, with only occasional spikes of activity. The B-series is specifically designed for this usage pattern — it provides a baseline level of CPU performance with the ability to burst above that baseline when needed. For workloads that average less than 20% CPU utilisation, moving from a D-series to an equivalently specified B-series VM can reduce costs by 40% to 60% with no perceptible impact on performance.
Conversely, running a consistently CPU-intensive workload on a B-series VM is a false economy. B-series VMs accumulate CPU credits during low-usage periods and spend them during bursts. If a workload consistently depletes its credits, the VM is throttled to its baseline performance, which can be as low as 5% to 20% of a full vCPU. For sustained compute workloads, the F-series provides better value because every vCPU delivers consistent, full-speed performance without the credit mechanism overhead.
Identifying Zombie VMs and Idle Resources
Before focusing on right-sizing active workloads, address the low-hanging fruit: virtual machines that are running but serving no useful purpose whatsoever. These "zombie" VMs are surprisingly common in Azure environments and represent pure waste — they consume budget every hour of every day without delivering any business value in return.
Zombie VMs accumulate through several common scenarios. A development team spins up VMs for a proof-of-concept project that is later abandoned, but nobody remembers to decommission the infrastructure. A testing environment is created for a specific release cycle and forgotten after deployment. A legacy application is migrated to a new platform, but the old VMs are left running "just in case" and are never switched off. Staff turnover means that the person who created the resource has left the organisation, and their successors are reluctant to delete something they do not fully understand.
The financial impact of zombie VMs is substantial. A typical UK mid-market business with 50 to 100 Azure VMs will have between 5 and 15 zombie VMs consuming £500 to £3,000 per month in aggregate — that is £6,000 to £36,000 per year in completely wasted spend. Identifying and removing these VMs is often the single most impactful cost optimisation action an organisation can take, delivering immediate savings with zero risk to production services.
To identify zombie VMs, examine several indicators in combination. VMs with sustained CPU utilisation below 2% over a 30-day period are strong candidates. VMs with no inbound network connections suggest that no users or systems are actively communicating with them. VMs with no recent login activity (check Azure Activity Log for RDP or SSH connections) may have been abandoned. VMs whose associated resource group has not been modified in months are often remnants of completed projects. Azure Advisor flags some of these as "shut down" recommendations, but a manual review using Azure Monitor metrics provides a more comprehensive picture.
Before deleting any suspected zombie VM, follow a safe decommissioning process. First, identify the resource owner through Azure tags, resource group naming conventions, or the Activity Log to determine who created it. Second, shut down the VM (deallocate, not just stop) and wait two weeks whilst monitoring for any complaints or service disruptions. If nobody notices the VM is gone after a fortnight, it is safe to delete. This conservative approach avoids the risk of accidentally removing a resource that serves an important but infrequent function, such as a quarterly reporting server or a disaster recovery standby instance.
The Right-Sizing Process
Effective right-sizing follows a structured process: monitor, analyse, recommend, implement, and verify. Skipping steps or rushing the process increases the risk of performance issues, which can erode stakeholder confidence in cloud cost optimisation.
Step 1: Establish Monitoring
Before making any changes, ensure comprehensive monitoring is in place. Azure Monitor collects CPU, memory, disk, and network metrics by default for all VMs. However, to get memory utilisation data (which is critical for right-sizing), you need to enable the Azure Monitor Agent and configure the appropriate data collection rules. Without memory data, you are making decisions with only half the picture — a VM might show low CPU usage but be heavily utilising memory, making a downsize inappropriate.
Step 2: Collect Sufficient Data
A minimum of 14 days of monitoring data is recommended, and 30 days is preferable. This ensures you capture weekly patterns, month-end processing peaks, and any other cyclical workload variations. Making right-sizing decisions based on a few days of data risks missing periodic spikes that could cause problems after downsizing.
Step 3: Analyse and Recommend
Review the monitoring data for each VM, looking at average, peak, and 95th percentile utilisation for CPU, memory, and disk I/O. A VM that averages 8% CPU utilisation with peaks of 25% is a strong candidate for downsizing. A VM that averages 12% CPU but peaks at 90% during month-end processing requires more careful analysis — you might keep the current size but consider Azure Spot instances or reserved instances to reduce cost without reducing capacity.
When analysing right-sizing candidates, pay close attention to the relationship between different resource dimensions. A VM might have low CPU utilisation but high memory consumption, suggesting it should be moved to an E-series (memory-optimised) VM rather than simply downsized within the D-series. Similarly, a VM with moderate CPU and memory usage but very high disk I/O should be evaluated for the L-series (storage-optimised) family. Right-sizing is not simply about choosing a smaller instance — it is about choosing the most appropriate instance for the workload characteristics.
Step 4: Implement Changes
Resizing an Azure VM is technically straightforward — it requires a brief stop and restart of the VM, typically taking 2 to 5 minutes. However, this means a short outage for the application running on that VM, so changes should be scheduled during maintenance windows. For critical production systems, consider implementing changes during off-hours and having a rollback plan ready — you can resize back to the original size if issues arise.
Step 5: Verify and Iterate
After implementing right-sizing changes, monitor the affected VMs closely for at least two weeks. Verify that performance metrics remain within acceptable ranges and that application response times have not degraded. Right-sizing is not a one-off exercise — it should be repeated quarterly as workloads evolve, new applications are deployed, and business requirements change.
Right-Sizing Storage and Managed Disks
Whilst VM compute costs attract the most attention, Azure storage costs are frequently overlooked as an optimisation opportunity. Every Azure VM has at least one managed disk attached, and the choice of disk tier, size, and configuration has a significant impact on monthly costs. For organisations with dozens or hundreds of VMs, storage optimisation can deliver savings comparable to compute right-sizing.
Azure offers four managed disk tiers, each designed for different performance requirements. Premium SSD delivers the highest performance with guaranteed IOPS and throughput, suitable for production databases and latency-sensitive applications. Standard SSD provides consistent SSD performance at a lower price point, appropriate for web servers, lightly used application servers, and development environments. Standard HDD offers the lowest cost for infrequent access patterns, suitable for backups, archives, and non-critical batch processing. Ultra Disk provides extreme performance for the most demanding workloads such as SAP HANA and large-scale transaction processing.
The most common storage waste occurs when Premium SSD disks are used for workloads that would perform equally well on Standard SSD. A Premium P10 disk (128 GiB) costs approximately £15 per month in the UK South region, whilst a comparable Standard SSD E10 disk costs approximately £6 per month — a 60% saving per disk. Across an environment with 50 VMs, each with two managed disks, moving non-critical workloads from Premium to Standard SSD can save £500 to £900 per month without any perceptible performance impact for most applications.
Disk sizing presents another optimisation opportunity. Azure managed disk pricing is tiered by size, with significant price jumps at each tier boundary. A 128 GiB Premium SSD costs less per GiB than a 64 GiB Premium SSD, but a 256 GiB disk costs considerably more in absolute terms. If a 128 GiB disk is only 30% utilised, the business is paying for 90 GiB of unused capacity. Reviewing actual disk utilisation across your estate and downsizing where possible can yield meaningful savings.
Snapshot management is an often-neglected area of storage cost. Azure disk snapshots are commonly used for backup purposes, but old snapshots are rarely cleaned up. Each snapshot is billed based on its size, and over time, forgotten snapshots can accumulate into a substantial cost. Implement a snapshot lifecycle policy that automatically deletes snapshots older than a defined retention period — 30 days is sufficient for most operational purposes, with longer retention only for snapshots that serve a specific compliance or disaster recovery requirement.
Beyond Right-Sizing: Additional Azure Cost Optimisation
Right-sizing is the foundation of Azure cost management, but it should be combined with other optimisation strategies for maximum impact. Azure Reserved Instances offer discounts of 30% to 72% for VMs committed to one or three-year terms. Azure Hybrid Benefit allows organisations with existing Windows Server licences to use them in Azure, saving up to 40% on Windows VM costs. Auto-shutdown policies for development and testing VMs that do not need to run 24/7 can halve their costs instantly.
For UK organisations, Azure Savings Plans provide a more flexible alternative to Reserved Instances. Rather than committing to a specific VM size and region, Savings Plans commit to a fixed hourly spend amount across any combination of VM sizes and regions. This flexibility is particularly valuable for organisations whose workload mix changes over time — you still receive significant discounts (up to 65%) but without the rigidity of being locked into specific VM configurations. Savings Plans and Reserved Instances can be combined for maximum benefit, with Reserved Instances covering stable, predictable workloads and Savings Plans covering the variable remainder.
Azure Spot VMs offer the deepest discounts — up to 90% off pay-as-you-go pricing — for workloads that can tolerate interruption. Spot VMs use spare Azure capacity and can be evicted with 30 seconds' notice when Azure needs the capacity back. This makes them ideal for batch processing, rendering, large-scale data analysis, continuous integration builds, and development/testing workloads. UK businesses running computationally intensive but non-time-critical workloads can achieve dramatic cost reductions by redesigning their pipelines to use Spot VMs with appropriate checkpoint and retry mechanisms.
Cost Optimisation Best Practices
- Right-size VMs based on actual utilisation data
- Use Reserved Instances for predictable workloads
- Apply Azure Hybrid Benefit for Windows licences
- Auto-shutdown dev/test VMs outside hours
- Use B-series burstable VMs for low-CPU workloads
- Review Azure Advisor recommendations weekly
- Tag all resources for cost allocation
- Set budget alerts to catch unexpected spend
Common Cost Mistakes
- Matching on-premise specs without analysis
- Using Pay-As-You-Go for production workloads
- Running dev/test VMs 24/7 unnecessarily
- Using premium storage for non-critical VMs
- Not monitoring utilisation after deployment
- Ignoring Azure Advisor recommendations
- No resource tagging or cost attribution
- No budget alerts or spending governance
Building a Cloud Cost Governance Framework
Achieving cost savings through right-sizing is only half the challenge. The other half is maintaining those savings over time and preventing waste from creeping back in. Without a structured governance framework, cloud environments naturally drift towards over-provisioning as new resources are added, workloads change, and the urgency of the initial optimisation exercise fades from memory. A robust governance framework institutionalises cost-conscious behaviour and makes efficient resource allocation the default rather than the exception.
Resource tagging is the foundation of cloud cost governance. Every Azure resource should be tagged with at minimum the owning team or department, the environment (production, staging, development, testing), the project or application name, and a cost centre for chargeback or showback purposes. Without consistent tagging, it is impossible to attribute costs to specific business units, identify which teams are driving spend increases, or enforce accountability for resource consumption. Azure Policy can enforce mandatory tagging at the point of resource creation, preventing untagged resources from being deployed in the first place.
Budget alerts provide early warning of unexpected cost increases. Azure Cost Management allows you to set monthly budgets at the subscription, resource group, or tag level, with automated email alerts at defined thresholds (for example, 50%, 75%, 90%, and 100% of budget). For UK organisations with tight cloud budgets, configuring alerts at the resource group level provides granular visibility into which teams or projects are approaching their limits. More advanced organisations use Azure Cost Management Action Groups to trigger automated responses when budgets are exceeded — for instance, automatically shutting down non-production VMs or sending notifications to Slack or Microsoft Teams channels.
Establish a regular review cadence. Monthly cost reviews involving both technical and finance stakeholders ensure that cloud spend remains visible and accountable at the organisational level. These reviews should examine total spend against budget, the top 10 cost-driving resources, any new resources created during the period, Azure Advisor recommendations outstanding, and progress against right-sizing actions from previous reviews. Quarterly deep-dive reviews should assess Reserved Instance utilisation, Savings Plan coverage, and whether the overall Azure architecture remains cost-effective as business requirements evolve.
Role-based access control (RBAC) plays a critical role in cost governance. Restricting who can create and resize VMs prevents uncontrolled provisioning. Consider implementing an approval workflow for VM sizes above a certain threshold — for example, requiring management approval for any VM larger than a D4s v5 or any resource expected to cost more than £500 per month. Azure Policy can enforce VM size restrictions at the subscription level, ensuring that development teams cannot accidentally or intentionally provision expensive high-specification VMs when smaller instances would suffice.
For UK businesses subject to financial regulation or public sector spending requirements, cloud cost governance intersects with broader compliance obligations. Government organisations following the Technology Code of Practice must demonstrate value for money in cloud spending. Financial services firms must show auditors that cloud costs are controlled and attributable. A well-documented governance framework with clear policies, regular reviews, and automated controls satisfies these requirements whilst simultaneously driving genuine cost efficiency.
Azure Cost Optimisation Maturity Scores
The following scores represent the typical maturity level observed across UK mid-market Azure environments before a systematic optimisation programme. Most organisations score poorly because cost governance has not been a priority — the good news is that every area below represents a concrete, achievable improvement opportunity.
Reduce Your Azure Spend Today
Cloudswitched helps UK businesses optimise their Azure environments for performance and cost efficiency. From right-sizing assessments and Reserved Instance planning to comprehensive Azure governance, we ensure every pound of your cloud budget delivers value.
Explore Azure Cloud Solutions
CloudSwitched
London-based managed IT services provider offering support, cloud solutions and cybersecurity for SMEs.


